
 The pace of progress around here has been hectic since around mid-October. During that time, Hubby built 7 picture frames for me to use for our "Hallway Gallery" to showcase our children. In the process of matting them, I found that I had several pieces of matting left over that would be just the right size (with a small modification) for book backs. After studying on it for a while I decided that I could make my own journal. So I did.
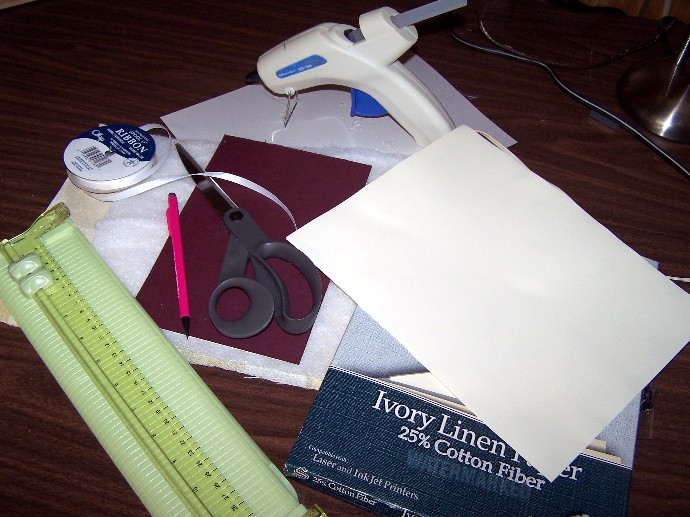
 I started with 25% cotton fiber Ivory Linen paper. Taking 6 sheets, I folded them as perfectly in half as I could, then stitched along the fold using quilting thread. After sizing and trimming the mat board pieces ( 1 front and 1 back) to the right size, I picked a fabric that I really liked that had some stiffness to it. The fabric left-overs from the bathroom curtains worked great. Laying the pieces side by side, I placed the folded papers (sewn edge down) between the 2 sides to get an idea of the space needed to be left between the front and back. With this size idea, I placed the front mat over different sections of the fabric piece until I found an area that looked the way I wanted the front cover to look. Then placing both front and back on the fabric, with spacing left for the pages of the book, I marked the fabric with a 1 & 1/2 inch allowance on all sides for the fold over. A piece of batting was cut the exact size (no folding allowance)..
Using my photo trimmer, I folded all the pages on the seam line and trimmed the excess caused by folding so many pieces of paper.
Placing the fabric right side down on the worktable (after pressing to make sure all wrinkles were out), the batting piece was placed and then the mat board pieces. The corners were cut in a straight line up to edge of mat board so that when gluing the top and bottom there would be no fold of the side fabric. Using hot glue (and working quickly so I could smooth out the hot glue as much as possible), the fabric allowance is folded over the top of both front and back in a straight line (with the space left for the pages in between) and glued as smoothly as possible. The same is done with the bottom edges. Before beginning the sides, a cut was made removing the square of excess fabric in the corners. The corners were glued into a triangular edge, the the entire side glued to the mat board taking care to pull the fabric firmly so there would be no wrinkling. A line of hot glue was run along the stitched edge of the pages, then the pages were placed into the space between the back and front of the book. The front page of the book was then glued to mat board covering all edges of the fabric. The same was done to the back page. The book was closed and the ribbon was added with hot glue. All done...
I will add here that this book was an experiment to see how difficult this might be. On another book, I would try to use another kind of glue for the covering (not on the seam of the pages) as I think the hot glue dries too quickly to make a smooth finish. However.. I am quite pleased with results of the experiment.
This entire project took only a couple of hours to finish.
No comments:
Post a Comment